The Volkswagen Ignition Lock Assembly design has undergone very few changes throughout the years. Failure of this component may cause several different issues. If the electrical portion is faulty, you may experience various gremlins that are seemingly impossible to diagnose. If the mechanical portion malfunctions, you may not be able to get the key in or out of a certain position. The steering wheel may also be stuck in the lock position.
Today we are working with a MKVI Jetta which has an issue with the key intermittently being stuck in the ON position. First we will need to access the lock assembly in order to determine what is going on. Steering lock housing removal is not required to remove the lock cylinder, or to remove the electrical switch. The steering lock housing will only need to be replaced if there is a fault in the steering lock function.
In order to remove the steering wheel we will need to remove the airbag. Before working on any part of the airbag system remove the negative battery cable and wait at least two minutes. You may reconnect the negative cable for testing after the airbag is removed, but you will need to clear any faults after reassembly.
Extend the steering column all the way outwards. Rotate the steering wheel 90 degrees from the straight ahead position to expose the airbag locking tabs.

Working from behind the steering wheel, release the airbag locking tabs using a flat head screwdriver.

Steering wheel removed for clarity.
Slide the locking tab out and press downward to remove the airbag connector. Disconnect the connecter for the steering wheel controls.

Always store the airbag facing upward, in case of accidental deployment.

Make sure the steering wheel is centered with the wheels in the straight ahead position. Remove the XZN12M Triple Square bolt.
Note the position of the marking on the steering wheel and steering shaft before removing the steering wheel.

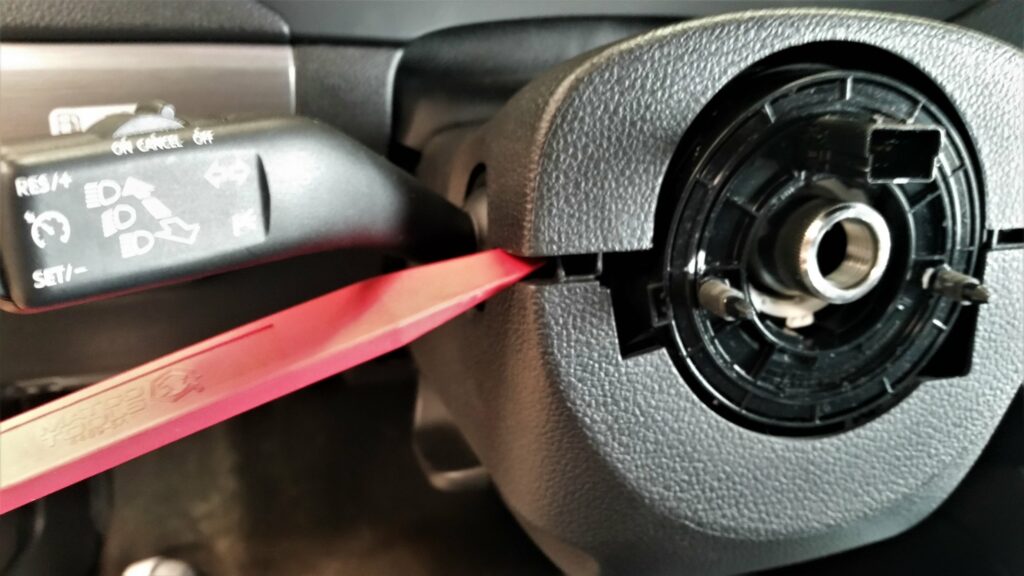
Using a suitable trim tool, separate the upper half of the steering column shroud.
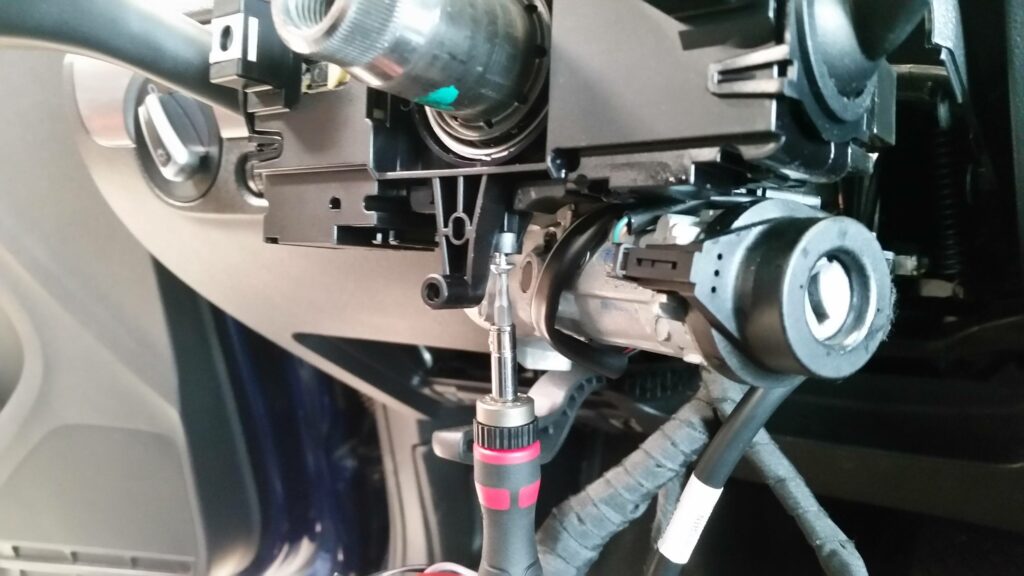
Remove the three T25 torx bolts. Two are shown here, and there is one more on the bottom of the lower cover. You can access these bolts with the steering wheel installed if you are not replacing the complete lock assembly.

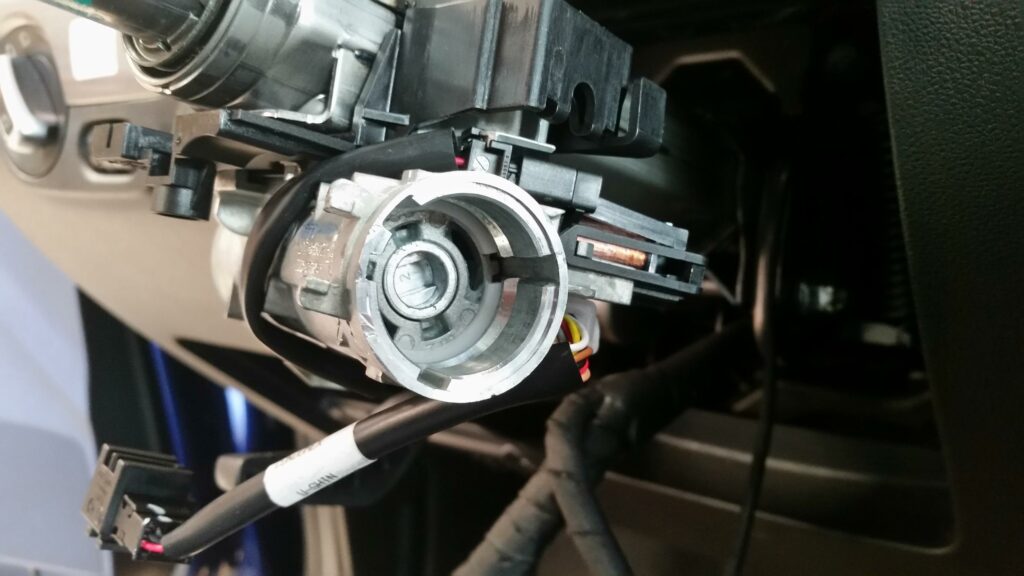
Turn the key 90 degrees to the on position and insert a paperclip into the small hole in the lock cylinder.

The goal is to push the paperclip through the hole on the retaining tab.

Getting the paperclip to line up with the hole can be a little bit tricky. It will take a bit of finesse to get the correct angle. Once the paperclip is inserted into the retaining tab, the lock cylinder should pop out easily.
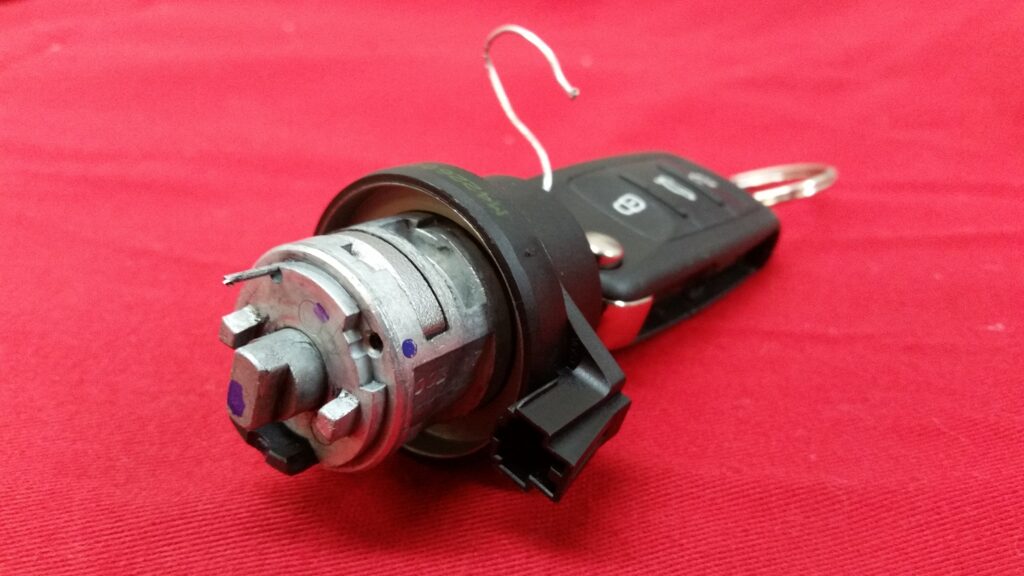
Once the lock cylinder is removed, you can insert a flat blade screwdriver into the slot and rotate the lock mechanism. Check for any binding, and make sure everything rotates smoothly. Also check the operation of the lock cylinder, remove the paper clip and check for any binding.
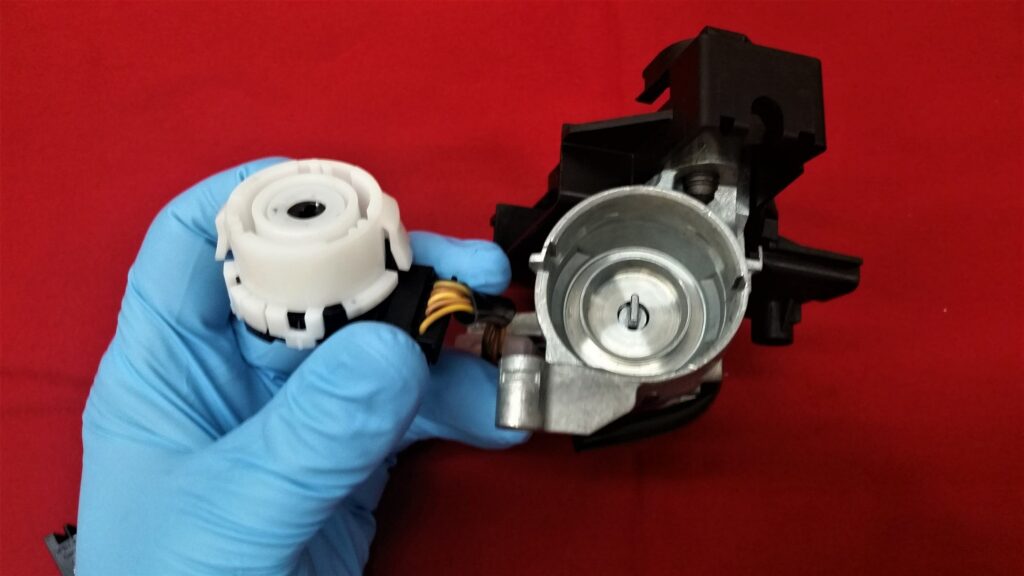
If you need to remove the electrical ignition switch, it is not necessary to remove the steering wheel. Removal of the ignition switch is shown here, with the lock mechanism removed, for clarity.3a0f
Remove the round cover from the ignition switch, with two picks depress the two locking tabs to release the switch from the housing.

Note the position of the locking tabs.
If it is determined that the lock mechanism is at fault, you will need to replace the complete assembly.
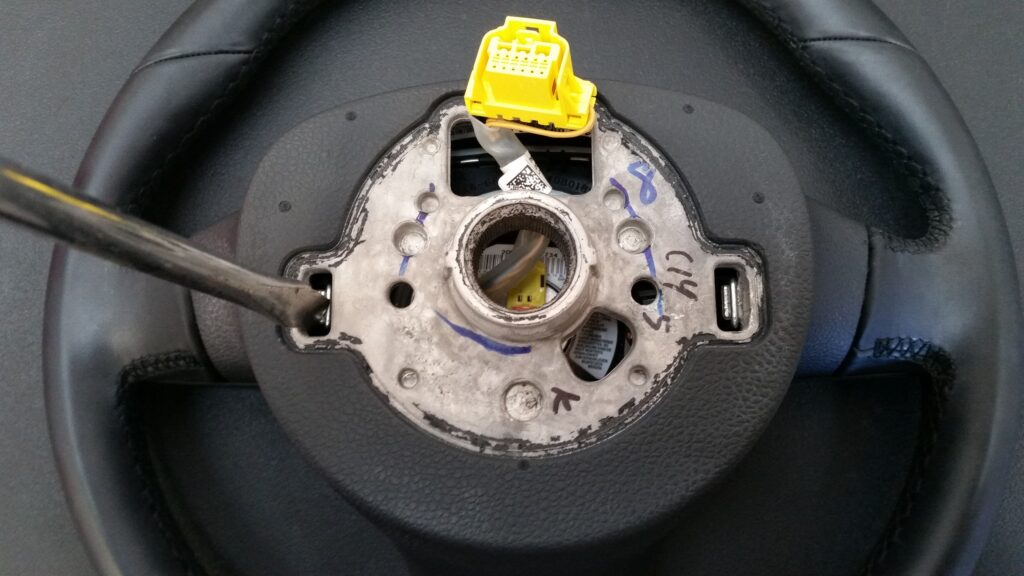
Remove the three T20 Torx screws securing the clockspring. When removing the clockspring, make sure the steering wheel is centered in the straight ahead position. Set it in a safe place and do not rotate the clockspring once removed.
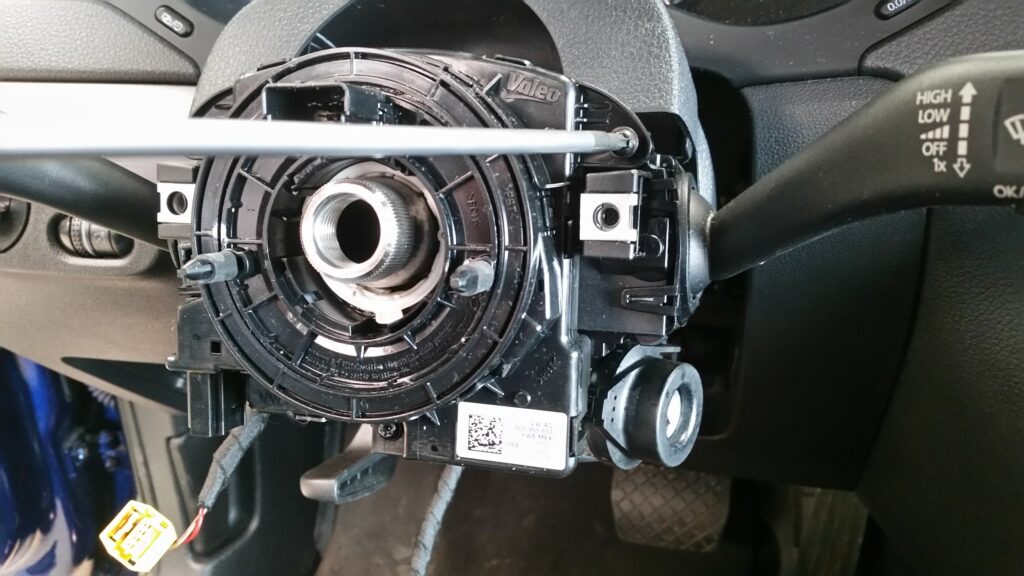
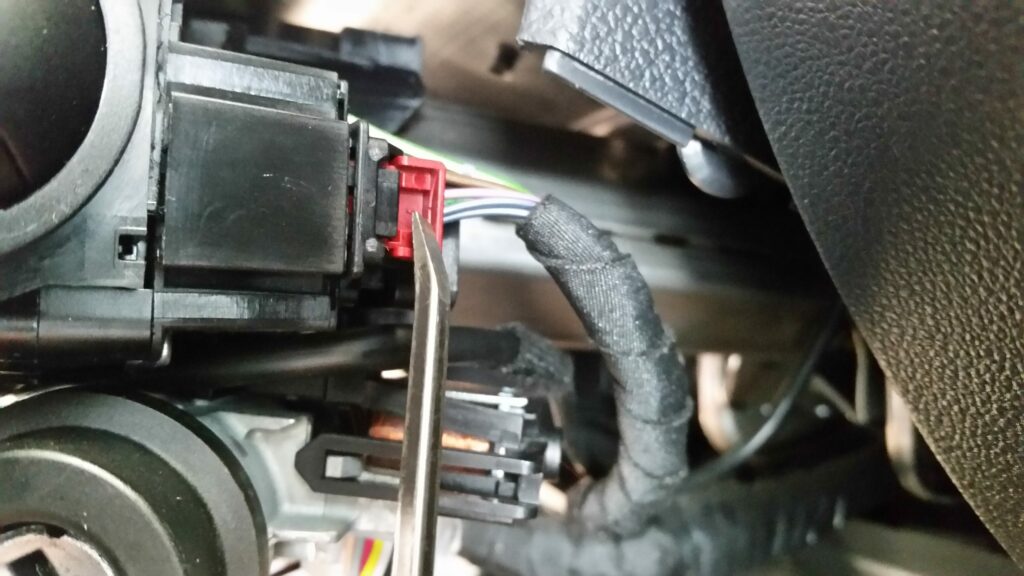
Disconnect the electrical connections by pulling the safety tab outwards, and then depress the locking tab. Take note of the wiring harness routing for reassembly.
Remove the T10 Torx screw, then remove the multifunction switch stalk assembly.
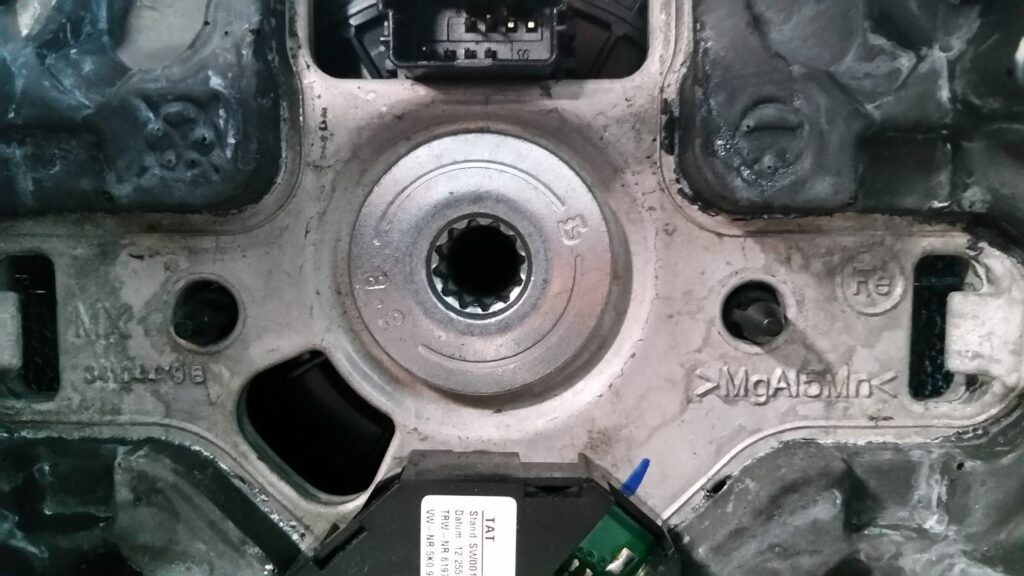
The shear bolts attaching the lock assembly can be accessed once the switches are removed.
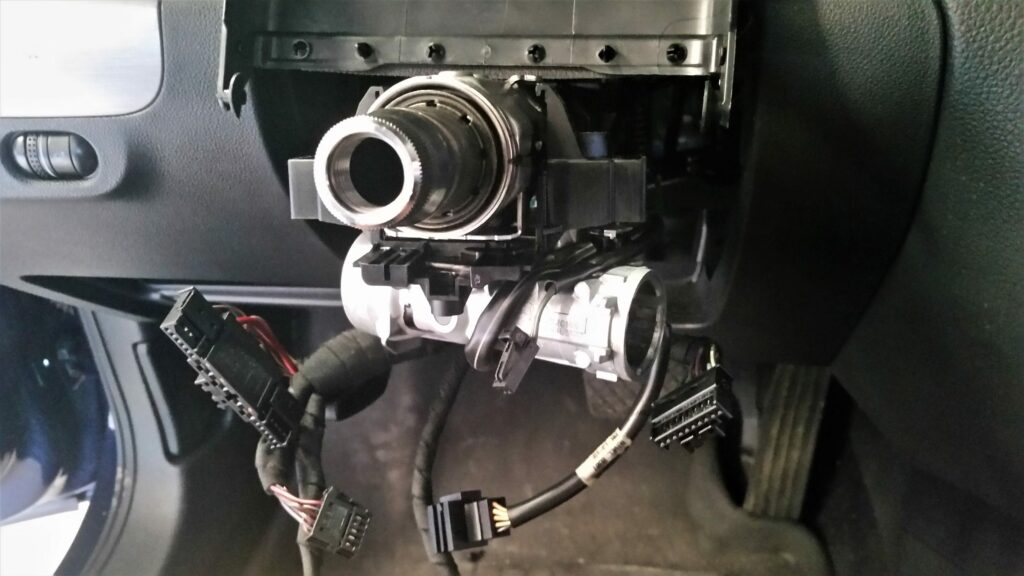
The ignition lock mechanism is secured to the steering column by two shear bolts for added security measures. Shear bolts are bolts in which the bolt head shears off when properly torqued, leaving no good way to remove them. These bolts are not heavily torqued, so it is fairly easy to remove them. You can remove them by drilling through the center of the bolt, and then using an extractor, or you can use a hammer and chisel for a bit of persuasion to get them to turn. We will use the hammer and chisel here, as it is the quickest and easiest way to loosen the shear bolts.
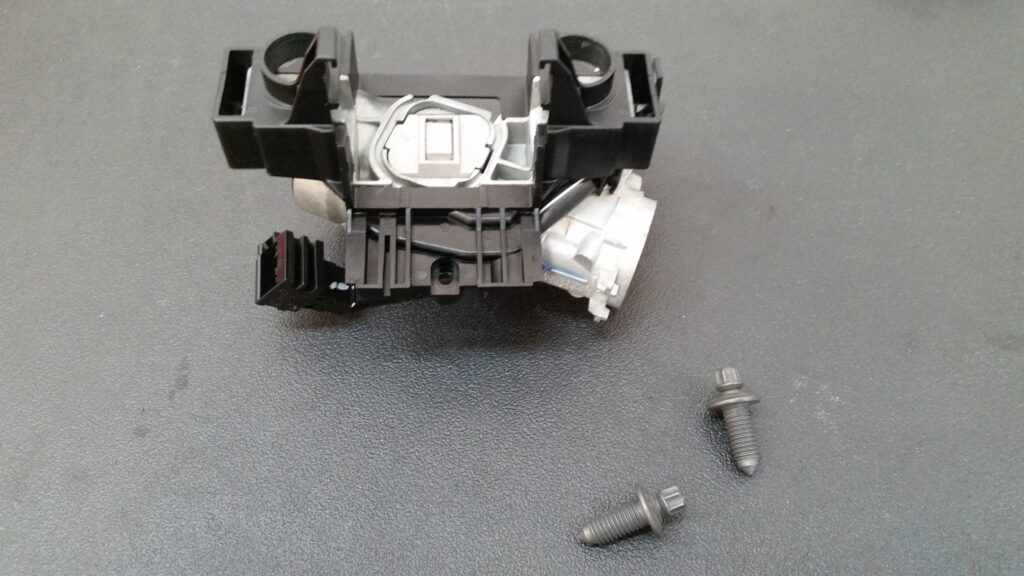
Using a sharp chisel attack the bolt with a slight angle in a counterclockwise direction. After a couple of sharp blows, the bolts should be broken loose enough to back them out by hand. Remove the lock mechanism from the steering column. You may need to wiggle it around a little bit to aid removal. Lock assembly removed for clarity.

Release the clips on the switch carrier and transfer the parts to the new lock mechanism.

It is recommended to replace the mechanism with two new shear bolts to ensure proper torque, and maintain the factory level of vehicle security. You will need an E8 external torx socket.
Position the lock mechanism onto the steering column and start the bolts by hand. Thread the bolts until they are just snug to allow for adjustment. Do not tighten them at this point. Insert the lock cylinder, with key, and remove the paperclip. The new lock mechanism should come in the correct position to insert the lock cylinder. Once installed, check that the key moves through all positions smoothly, while adjusting the position of the lock mechanism with the other hand. Make sure the key can be withdrawn and reinserted easily. Tighten the bolts a little more, alternating from one to the other to ensure even mating of the lock mechanism. Check the key in all positions several times. Temporarily install the steering wheel and check the operation of the steering lock when the key is withdrawn. Failure to do this may result in premature wear of the mechanism, or inability to turn or reinsert the key. Once you are positive that everything is aligned correctly, you may tighten the bolts until the head snaps off. Reassemble the parts in the reverse order of disassembly.