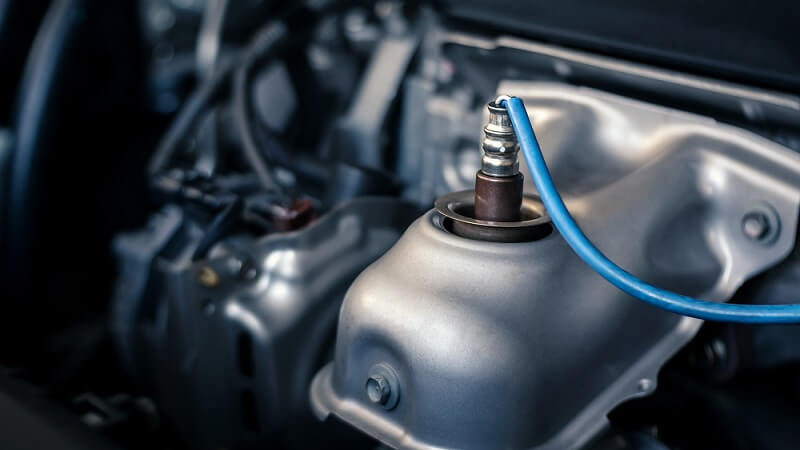
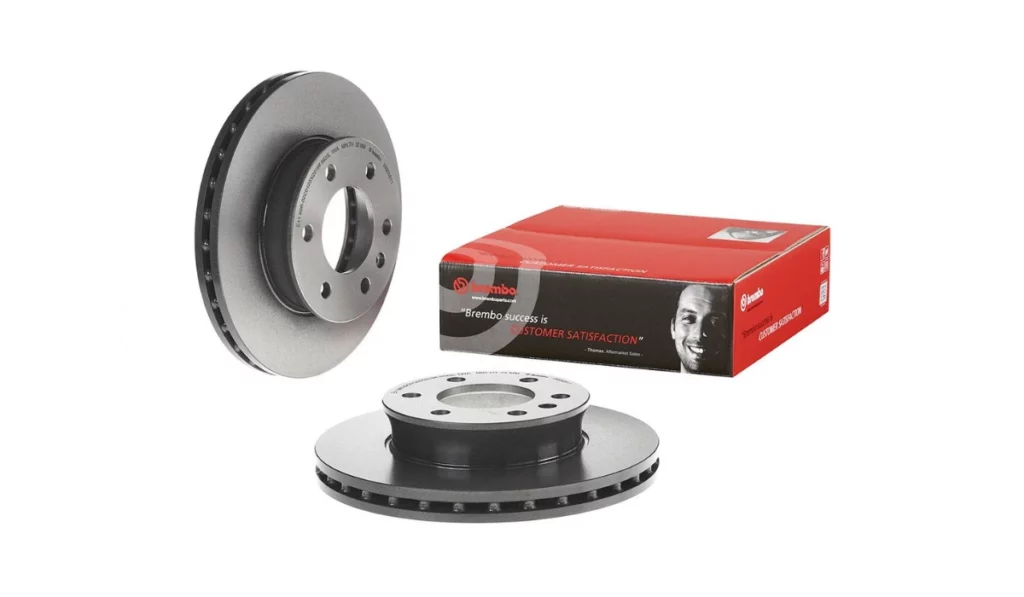
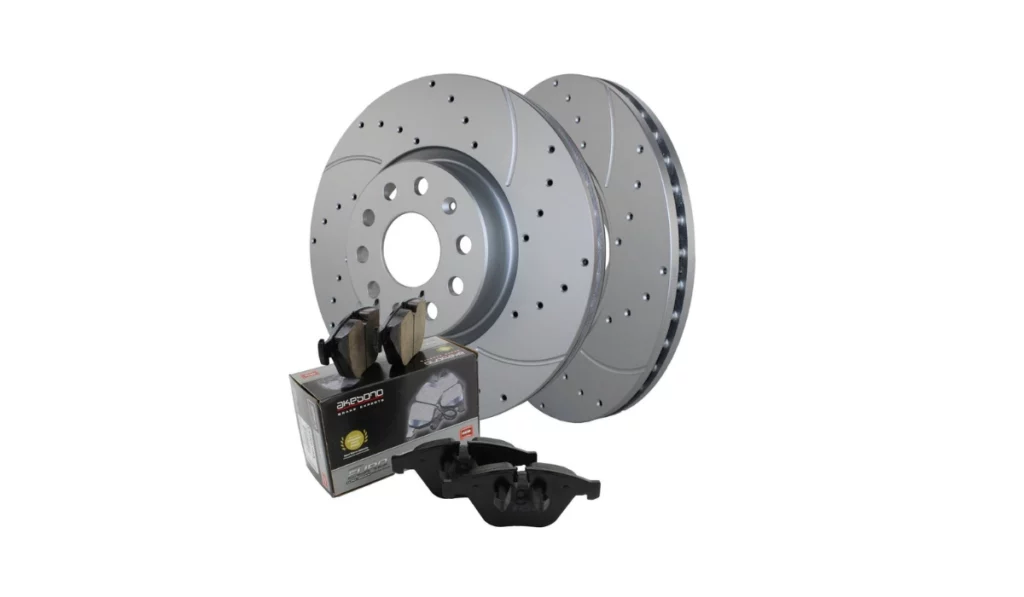
Brake rotors are a crucial component of a vehicle’s braking system, vitally important in ensuring safe and efficient braking performance. These rotors, also known as brake discs, work in conjunction with brake pads to convert kinetic energy into thermal energy, allowing your car to slow down or come to a complete stop.
Over time, brake rotors can wear down, affecting their thickness and overall effectiveness. Maintaining the appropriate rotor thickness is essential for optimal braking performance and safety.
In this guide, we’ll cover everything you need to know about brake rotors, including their function, the procedure for measuring their thickness, and step-by-step instructions on replacing them when necessary. By understanding these key aspects, you’ll be able to ensure your vehicle’s braking system remains in top-notch condition, providing you with safe and reliable performance.
Article updated on 06.25.2024

What Is Brake Rotor Thickness and Why Does It Matter?
Modern brake rotors are thinner than older models to reduce weight and costs, making them more susceptible to damage. Knowing your vehicle’s minimum rotor thickness is crucial, as driving with rotors thinner than this specification is dangerous.
Thinner brake rotors are less capable of absorbing and dissipating heat and are more prone to cracking and brake failure. If the rotors are below the minimum thickness and cannot be resurfaced, they must be replaced immediately. It is recommended that both rotors on the same axle be replaced simultaneously to avoid uneven braking.
What Exactly Is Brake Rotor Thickness?
Brake rotor thickness refers to measuring the thickness of the brake disc, a critical component of the braking system. Its measurement indicates how much material is left on the rotor. As brake rotors wear down over time, their thickness decreases, impacting their ability to dissipate heat and maintain proper braking performance effectively.

Regularly measuring and monitoring brake rotor thickness ensures that the rotors are within the manufacturer’s specified range, helping to prevent brake failure and maintain optimal braking efficiency.
Why It’s Crucial for Your Vehicle’s Safety and Performance
Maintaining the correct brake rotor thickness is crucial for your vehicle’s safety and performance. Thin or worn-out rotors can lead to decreased braking efficiency, longer stopping distances, and increased risk of brake fade, especially during high-demand situations such as emergency stops or downhill driving.
Furthermore, excessively worn rotors can cause uneven wear on brake pads and lead to vibrations or pulsations during braking. Ensuring that your brake rotors are within the recommended thickness range helps to maximize braking effectiveness, extend the life of other braking components, and ultimately keep you and your passengers safe on the road.

When To Check Brake Discs Thickness
It is recommended that you check the brake discs and pads every 10,000 miles. Check more frequently if you experience sudden squealing noises, the car pulling to one side when braking or your brake pedal vibrates when pressed. Inspect the brake discs whenever you replace the brake pads. Regular checks ensure that the rotors have sufficient material for safe braking.
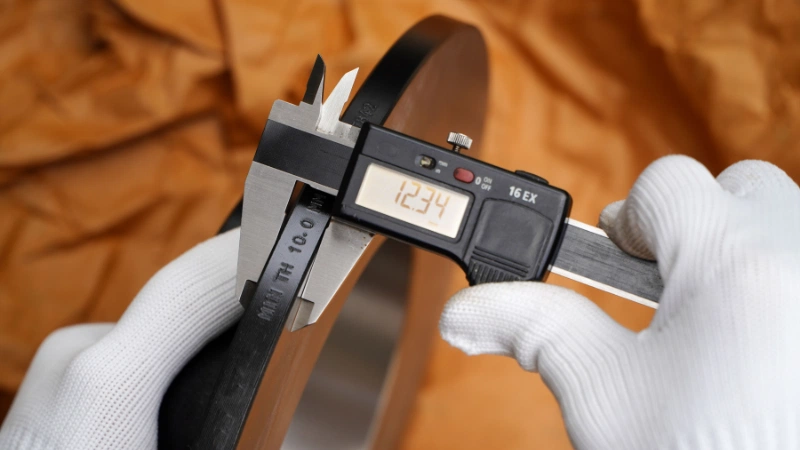
How to Measure Brake Rotor Thickness
Measuring brake rotor thickness is a vital maintenance task that ensures your braking system remains effective and safe. Proper measurement can help you determine if your rotors need replacing, preventing potential brake failure. Here, we’ll outline the tools you’ll need, provide tips for accurate measurement, and offer a step-by-step guide to measuring your brake rotors.
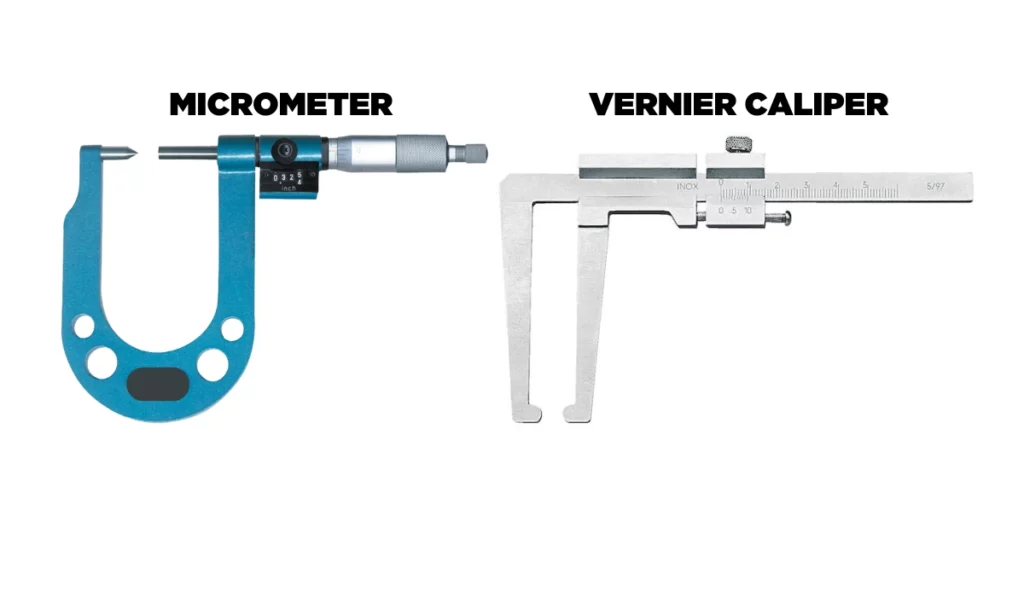
Tools You’ll Need for Accurate Measurement
Micrometer or Vernier caliper — These precision tools are essential for measuring the rotor thickness accurately.
Vehicle’s Repair Manual — Refer to your vehicle’s manual or manufacturer’s specifications for the minimum allowable thickness.
Clean cloth — To wipe the rotor surface clean before measurement.
Safety gear — Gloves, safety goggles, and respirator masks for safety during the process.
Step-by-Step Guide to Measuring Your Brake Rotors
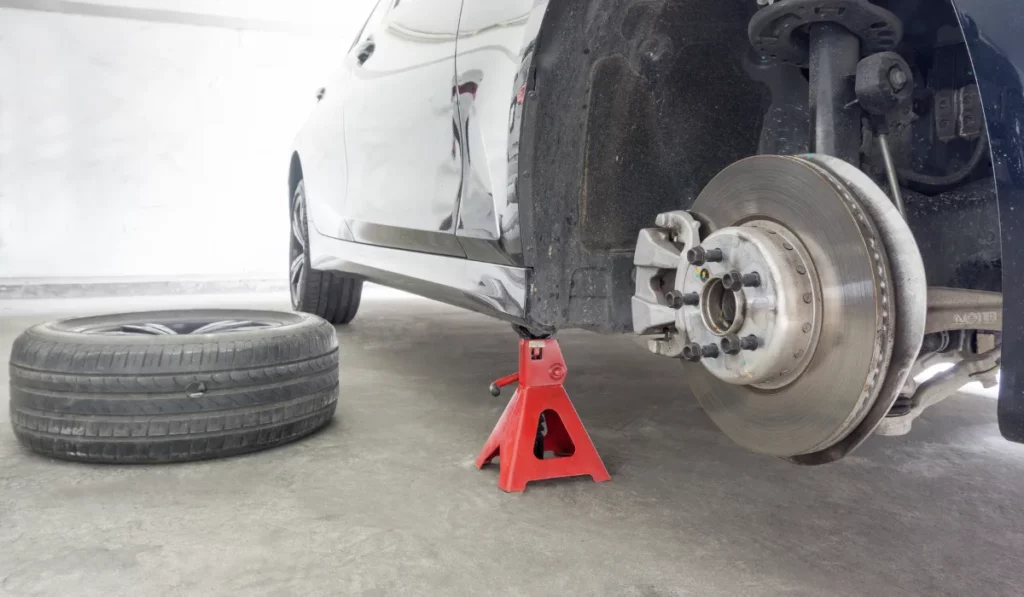
Step 1 — Lift the front or rear of the vehicle, depending on which rotors need to be measured. Secure the vehicle with a jack stand to ensure stability and safety.
Step 2 — Loosen and remove the lug nuts, then pull the wheels off the vehicle to expose the brake assembly.
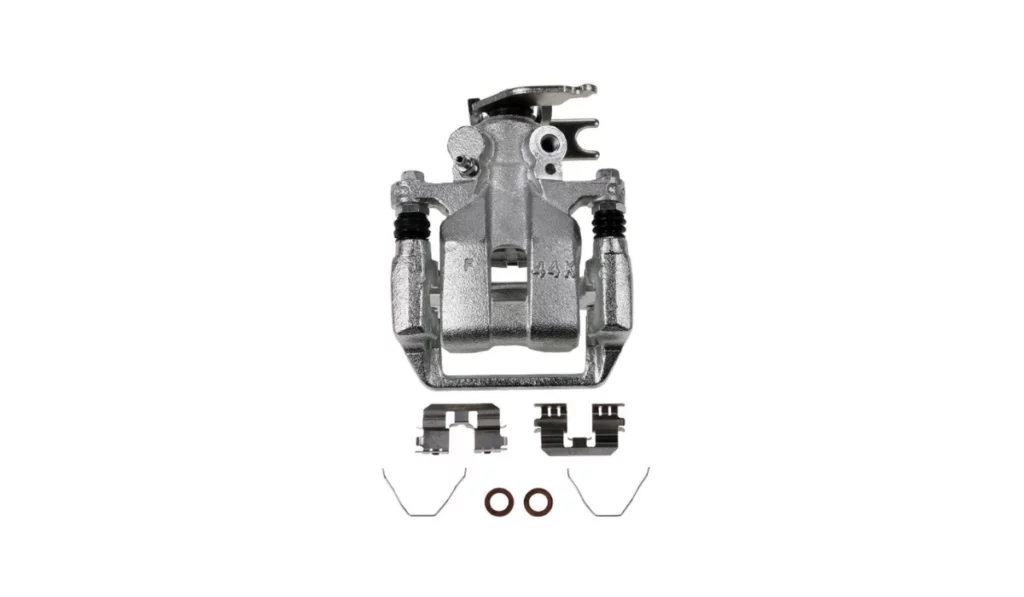
Step 3 — Carefully remove the brake caliper or the brake pads to access the rotor surface fully.
Step 4 — Check the brake rotor surface for cracks or damage. Thoroughly clean the rotor surface to ensure accurate measurements.
Step 5 — Using a micrometer or vernier caliper, measure the brake rotor thickness approximately 0.40 inches (10mm) inside the outer edge of the rotor. Take measurements around the rotor every 45 degrees (1/8 of a rotation).
Step 6 — Compare the lowest thickness value measured to the minimum thickness specifications stamped on the rotor or in the repair manual. If the rotor is below the minimum thickness, it must be replaced. If it is within specification, proceed to measure the parallelism.
Step 7 — To check parallelism, subtract the smallest thickness value from the largest measured value. If the difference is greater than 0.0006 inches (0.015mm) or as specified by the manufacturer, use an approved on-car brake lathe to machine the rotor. If the rotor falls below the minimum thickness after machining, it must be replaced.
Tips for Best Results
Avoid measuring the slots for slotted rotors, as they can skew the results. Similarly, steer clear of measuring the holes for dimpled or cross-drilled rotors. Always use a micrometer or vernier caliper that is properly calibrated to ensure precise measurements.
Additionally, clean the micrometer or vernier caliper jaws before each measurement to avoid debris affecting the accuracy. Following these tips will help you obtain consistent and reliable measurements for maintaining your brake rotors.


How Long Do Rotors Last On Average?
On average, rotors last between 30,000 to 70,000 miles, depending on driving habits and other conditions. Factors such as frequent heavy braking, driving in hilly or mountainous areas, and exposure to harsh weather conditions can shorten rotor lifespan. With proper care and driving style, brake rotors can last over 100,000 miles.
Safe driving habits and regular maintenance, including checking rotor thickness and replacing brake pads as needed, can help extend their life. Always refer to your vehicle’s maintenance schedule to ensure your rotors are in good condition and promptly address any signs of wear.
Affordable Genuine Auto Parts
At Newparts.com, you can find a broad selection of genuine car parts and OEM parts at unbeatable online prices. We aim to supply every car enthusiast with authentic auto parts, reducing vehicle maintenance costs.
Our curated selection meets your vehicle’s exact needs and adheres to OEM quality standards. We offer a diverse range of parts, from essential suspension components to maintenance items, ensuring your vehicle runs efficiently.
Opting for Newparts.com means enjoying substantial savings without sacrificing quality, making it a perfect choice for automotive DIY enthusiasts who value both affordability and high standards.
Our extensive inventory, easy-to-navigate website, and dedicated customer service ensure you find precisely what you want. Whether handling routine maintenance or major upgrades, Newparts.com is your ultimate source.
Signs Your Brake Rotors Might Need Replacement
Brake rotors are integral to your vehicle’s braking system, and their condition directly affects your safety on the road. Recognizing the signs of worn-out brake rotors can prevent potential brake failure and ensure timely maintenance. Let’s explore the common symptoms of deteriorating rotors and how to determine when it’s time to replace them.
Pulsating or Vibrating Brakes
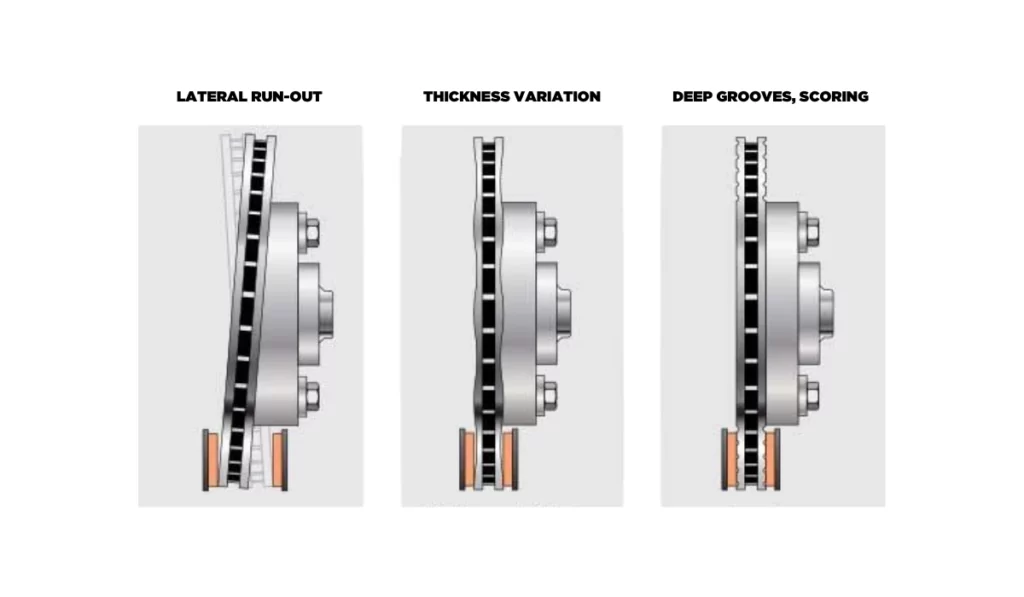
A pulsating or vibrating sensation when applying the brakes often indicates that the rotors have worn unevenly. This can be caused by high spots or variations in rotor thickness, which affect the smooth operation of the brake system. When you press the brake pedal, these inconsistencies can lead to vibrations felt through the pedal or steering wheel.
Loud Squealing or Grinding Noise
A loud squealing or grinding noise during braking can occur when the brake pads wear down to the metal and start directly contacting the rotor surface. This metal-on-metal contact creates unpleasant noise and damages the rotor surface, leading to grooves and scoring.
Inspecting the brake pads regularly and replacing them before they reach this critical point is important. Maintaining proper brake pad thickness can help prevent rotor damage and ensure effective braking.
Increased Stopping Distances
If you notice that your vehicle requires a longer distance to come to a complete stop, it could be a sign of worn rotors affecting braking efficiency. Thin or damaged rotors are less effective at converting kinetic energy into heat, reducing braking power. This can be especially dangerous in emergency situations where quick stopping is crucial.
How to Tell If It’s Time for a Replacement
Determining when to replace your brake rotors involves a combination of visual inspection and performance evaluation. Start by visually inspecting the rotors for any visible signs of damage, such as deep grooves, scoring, or significant rust buildup. If you see any of these signs, it’s likely time for a replacement.
Additionally, pay attention to the vehicle’s braking performance. If you experience any of the symptoms mentioned earlier — vibration, noise, or reduced braking efficiency — it’s crucial to have the rotors measured for thickness and compared against the manufacturer’s specifications. Regular maintenance and prompt attention to these warning signs can help ensure your vehicle’s braking system remains safe and effective.
Minimum Thickness Specifications
Adhering to the minimum thickness specifications for brake rotors is essential for maintaining the safety and performance of your vehicle’s braking system. Manufacturers provide these specifications to ensure the rotors function effectively under various driving conditions.
Don’t worry; we will help you understand these specifications and explain why it’s crucial never to go below the minimum thickness.
Understanding Manufacturer Specifications
Each vehicle manufacturer specifies a minimum thickness for brake rotors, which is the lowest allowable measurement for safe operation. These specifications are typically found in your vehicle’s owner’s manual or the vehicle’s repair manual or stamped directly on the rotor.
Adhering to these specifications ensures the brake rotors can withstand the heat and stress generated during braking. Operating with rotors below the specified thickness can compromise the rotor’s structural integrity and lead to potential brake failure. Checking the stamped specifications on the rotor can be a quick and reliable way to ensure your rotors are within safe limits, helping you maintain optimal braking performance and safety.
Why You Should Never Go Below the Minimum Thickness
Maintaining brake rotors within their specified thickness range is critical for ensuring vehicle safety and performance. Ignoring these specifications can have serious consequences, impacting your braking system and overall driving safety.
Safety Concerns
Using brake rotors that are below the minimum thickness can significantly reduce braking efficiency and increase stopping distances, posing a serious safety risk to you and others on the road. Thin rotors may not provide sufficient friction, leading to compromised braking performance.
Increased Wear and Tear
Rotors below the minimum thickness can cause uneven wear on brake pads, leading to further damage and increased maintenance costs. This uneven wear can cause the brake pads to deteriorate quickly, necessitating more frequent replacements and repairs.

Heat Dissipation Issues
Thinner rotors are less effective at dissipating heat, which can lead to brake overheating and brake fade, especially during high-demand situations such as emergency stops or downhill driving. Poor heat dissipation can reduce the overall efficiency of the braking system and increase the risk of brake failure.
Brake Rotor Cracking
Rotors that are too thin are more susceptible to cracking under stress, which can lead to catastrophic brake failure. Thin rotors may not be able to withstand the repeated stress of braking, leading to cracks and potential rotor disintegration, which is extremely dangerous.
The Consequences of Ignoring Thin Brake Rotors
Ignoring thin brake rotors can lead to severe consequences, affecting both your vehicle’s performance and your safety on the road. Understanding what happens when you drive with worn-out rotors and the potential dangers involved can help emphasize the importance of regular maintenance.

What Happens If You Drive with Worn-Out Rotors?
Driving with worn-out brake rotors can lead to a host of problems. As the rotors wear down, they become less effective at dissipating heat, which can cause the brakes to overheat and fade. This reduced efficiency means longer stopping distances, which can be particularly dangerous in emergency situations.
Worn rotors can also lead to uneven wear on the brake pads, causing further damage to the braking system and resulting in higher repair costs. You may also experience a pulsating or vibrating brake pedal, indicating that the rotors no longer provide a smooth surface for the brake pads to grip.
Potential Dangers and Risks
The potential dangers of driving with thin brake rotors are significant. Reduced braking efficiency increases the risk of accidents, especially during high-demand situations such as sudden stops or driving downhill.
Overheating the brakes can lead to brake fade, which causes them to lose their effectiveness and ultimately fail. This is particularly dangerous in emergency situations where reliable braking is crucial.
Worn rotors can crack under stress, leading to catastrophic brake failure. Regularly checking and maintaining brake rotor thickness is essential to avoid these risks and ensure your and your passengers’ safety.
Can I Drive With Bad Rotors?
It is not safe to drive with bad rotors. Damaged or excessively worn rotors can significantly reduce braking efficiency, leading to longer stopping distances and increased risk of accidents. Bad rotors can also cause vibrations, noise, and uneven wear on brake pads, further compromising your vehicle’s braking performance.
Driving with bad rotors can ultimately result in brake failure, putting you and others on the road in danger. It is essential to inspect and replace bad rotors promptly to maintain safe driving conditions.


Replacing Your Brake Rotors
Replacing your brake rotors is a crucial maintenance task that ensures your vehicle’s braking system remains in optimal condition. Proper brake rotor replacement can enhance your vehicle’s performance and safety, preventing potential brake failure.
Safety Steps
Safety is paramount when working on your vehicle’s braking system. Before you begin, ensure your vehicle is parked on a level surface. Use a reliable jack and jack stand to securely lift and support the vehicle. Always wear gloves, respirator masks, and safety goggles to prevent injuries and have a safe DIY experience. Make sure to consult your vehicle’s manual for specific safety instructions and guidelines related to your car model.

Tools You’ll Need
To replace your brake rotors, you’ll need the following tools:
- Gloves
- Respirator masks
- Safety goggles
- Shop towels or rags
- Sandpaper
- Hydraulic jack
- Jack Stand
- Lug wrench
- Ratchet and socket set
- Spanner set
- C-clamp or brake caliper tool
- Rubber mallet
- Torque wrench
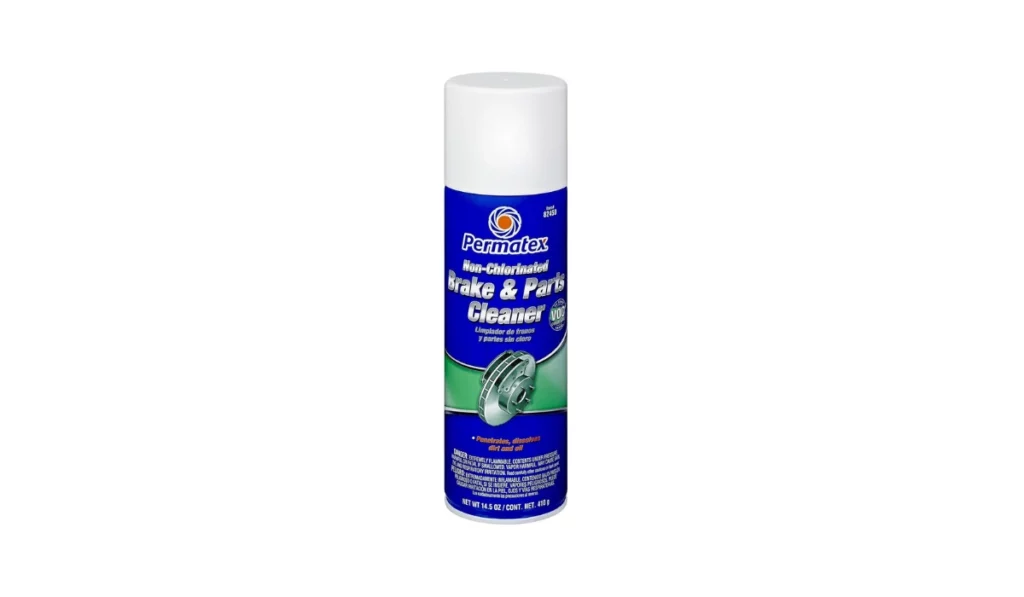
- Brake cleaner
- Anti-seize lubricant
Step-by-step Guide on Brake Rotor Replacement
Prepare Your Vehicle — Park your vehicle on a level surface and loosen the lug nuts on the wheels before lifting the car. Use a jack to lift the vehicle and secure it with jack stands.
Remove the Wheel — Undo the lug nuts and remove the wheel to access the brake assembly.
Remove the Brake Caliper — Remove the bolts holding the brake caliper in place. Carefully slide the caliper off the rotor and use a bungee cord or wire to hang it securely, ensuring it doesn’t dangle by the brake line.
Remove the Old Rotor — If the rotor is stuck, gently tap it free with a rubber mallet. Once loose, remove the rotor from the hub.
Clean the Hub Surface — Clean any rust or debris from the hub surface to ensure proper seating of the new rotor. Apply a thin coat of anti-seize on the wheel hub to prevent the rotor from getting stuck during the next removal.
Install the New Rotor — Clean the new rotor with brake cleaner to remove any protective coating. Place the new rotor onto the hub, ensuring it sits flush against the hub surface.
Reinstall the Brake Caliper — Retract the caliper piston using a C-clamp or brake caliper tool if necessary. Reinstall the caliper assembly over the new rotor and secure it with the caliper bolts, tightening them to the manufacturer’s specifications using a torque wrench.
Reattach the Wheel — Place the wheel back on, hand-tighten the lug nuts, and lower the vehicle. Once on the ground, use a torque wrench to tighten the lug nuts to the recommended torque.
Test the Brakes — Pump the brake pedal a few times to ensure the brake pads are properly seated against the new rotors. Take the vehicle for a test drive and bed in the new brake rotor.
Mechanics Tips and Tricks
When replacing brake rotors, it is highly recommended to use new brake pads to ensure optimal brake performance. New brake pads will match the flat surface of the new rotors perfectly, providing better contact and more efficient braking.
While it is possible to use old brake pads if they are still within the specified thickness, they should be sanded down to match the new rotor surface. However, replacing the brake pads eliminates the hassle of dealing with toxic brake dust and ensures the brakes function correctly. Using new brake discs and pads helps maintain a smooth and reliable braking system.

How Much Do New Rotors Cost?
The cost of new rotors can vary widely depending on the make and model of your vehicle. On average, you can expect to pay between $30 to $75 per rotor for standard vehicles. High-performance or specialty rotors can cost significantly more, ranging from $100 to $300 each.
Additionally, labor costs for installation can add another $150 to $200 per axle. Prices may vary based on your location and the specific parts required for your vehicle, so shopping around and comparing prices is advisable.
Maintaining Your Brake Rotors for Longevity
Proper maintenance of your brake rotors is essential for ensuring their longevity and the overall performance of your braking system. By following routine maintenance practices, you can prevent premature wear and extend the life of your rotors, ultimately enhancing your vehicle’s safety and reliability. In this section, we’ll provide tips for keeping your brake rotors in good condition and outline best practices for extending their lifespan.

Tips for Keeping Your Brake Rotors in Good Condition
Ensure regular brake inspections and servicing to keep your brake rotors in good condition. Check the thickness of your rotors periodically and replace them if they fall below the manufacturer’s recommended specifications. Avoid aggressive driving habits, such as rapid acceleration and hard braking, as these can increase the wear and tear on your rotors.
Keep your rotors clean by using brake cleaner to remove dust and debris, which can cause uneven wear and reduce braking efficiency. Ensuring your brake pads are in good condition and replacing them when necessary can also help maintain rotor health.
Best Practices for Extending Rotor Life
Adopting best practices for rotor maintenance can significantly extend their lifespan. First, practice smooth and gradual braking to minimize stress on the rotors. Ensure that your brake pads are high quality and compatible with your vehicle, as inferior pads can accelerate rotor wear. Regularly flush and replace your brake fluid to prevent contamination, which can lead to corrosion and damage.
It’s also important to have your rotors resurfaced or machined if they develop minor grooves or imperfections rather than waiting for them to become severely damaged. Finally, keep an eye on your vehicle’s overall braking system and address any issues promptly to avoid further damage to the rotors.
Need of New Brake Parts? Newparts.com Has Your Back!
When it comes time to replace your brake parts, you want quality, reliability, and affordability. Newparts.com is your go-to source for all your brake needs. We offer a vast selection of high-quality brake rotors, pads, and complete brake kits, ensuring you get the best parts for your vehicle.
With our easy-to-navigate website, finding the right parts has never been simpler. Plus, our expert customer service team is always ready to assist you with any questions or concerns. Don’t compromise on your safety—trust Newparts.com for all your brake part needs and enjoy peace of mind knowing you’re getting the best products on the market.
Visit Newparts.com today and keep your vehicle’s braking system in top-notch condition.